darktable: Give Your RAW Photos a Proper Finish
- Photography
- RAW editing
- Open source
A RAW photograph can be an underwhelming first date. The camera preview looked lively, but the file opened on your computer seems flatter and less finished. That does not necessarily mean the camera forgot how colours work. You may simply be looking at a different starting point.
darktable is a free, open-source photography application for organising and developing images, especially RAW files. It gives you control over the processing while preserving the original image. The price of that control is a little learning, rather than a promise that one button will rescue every photograph.
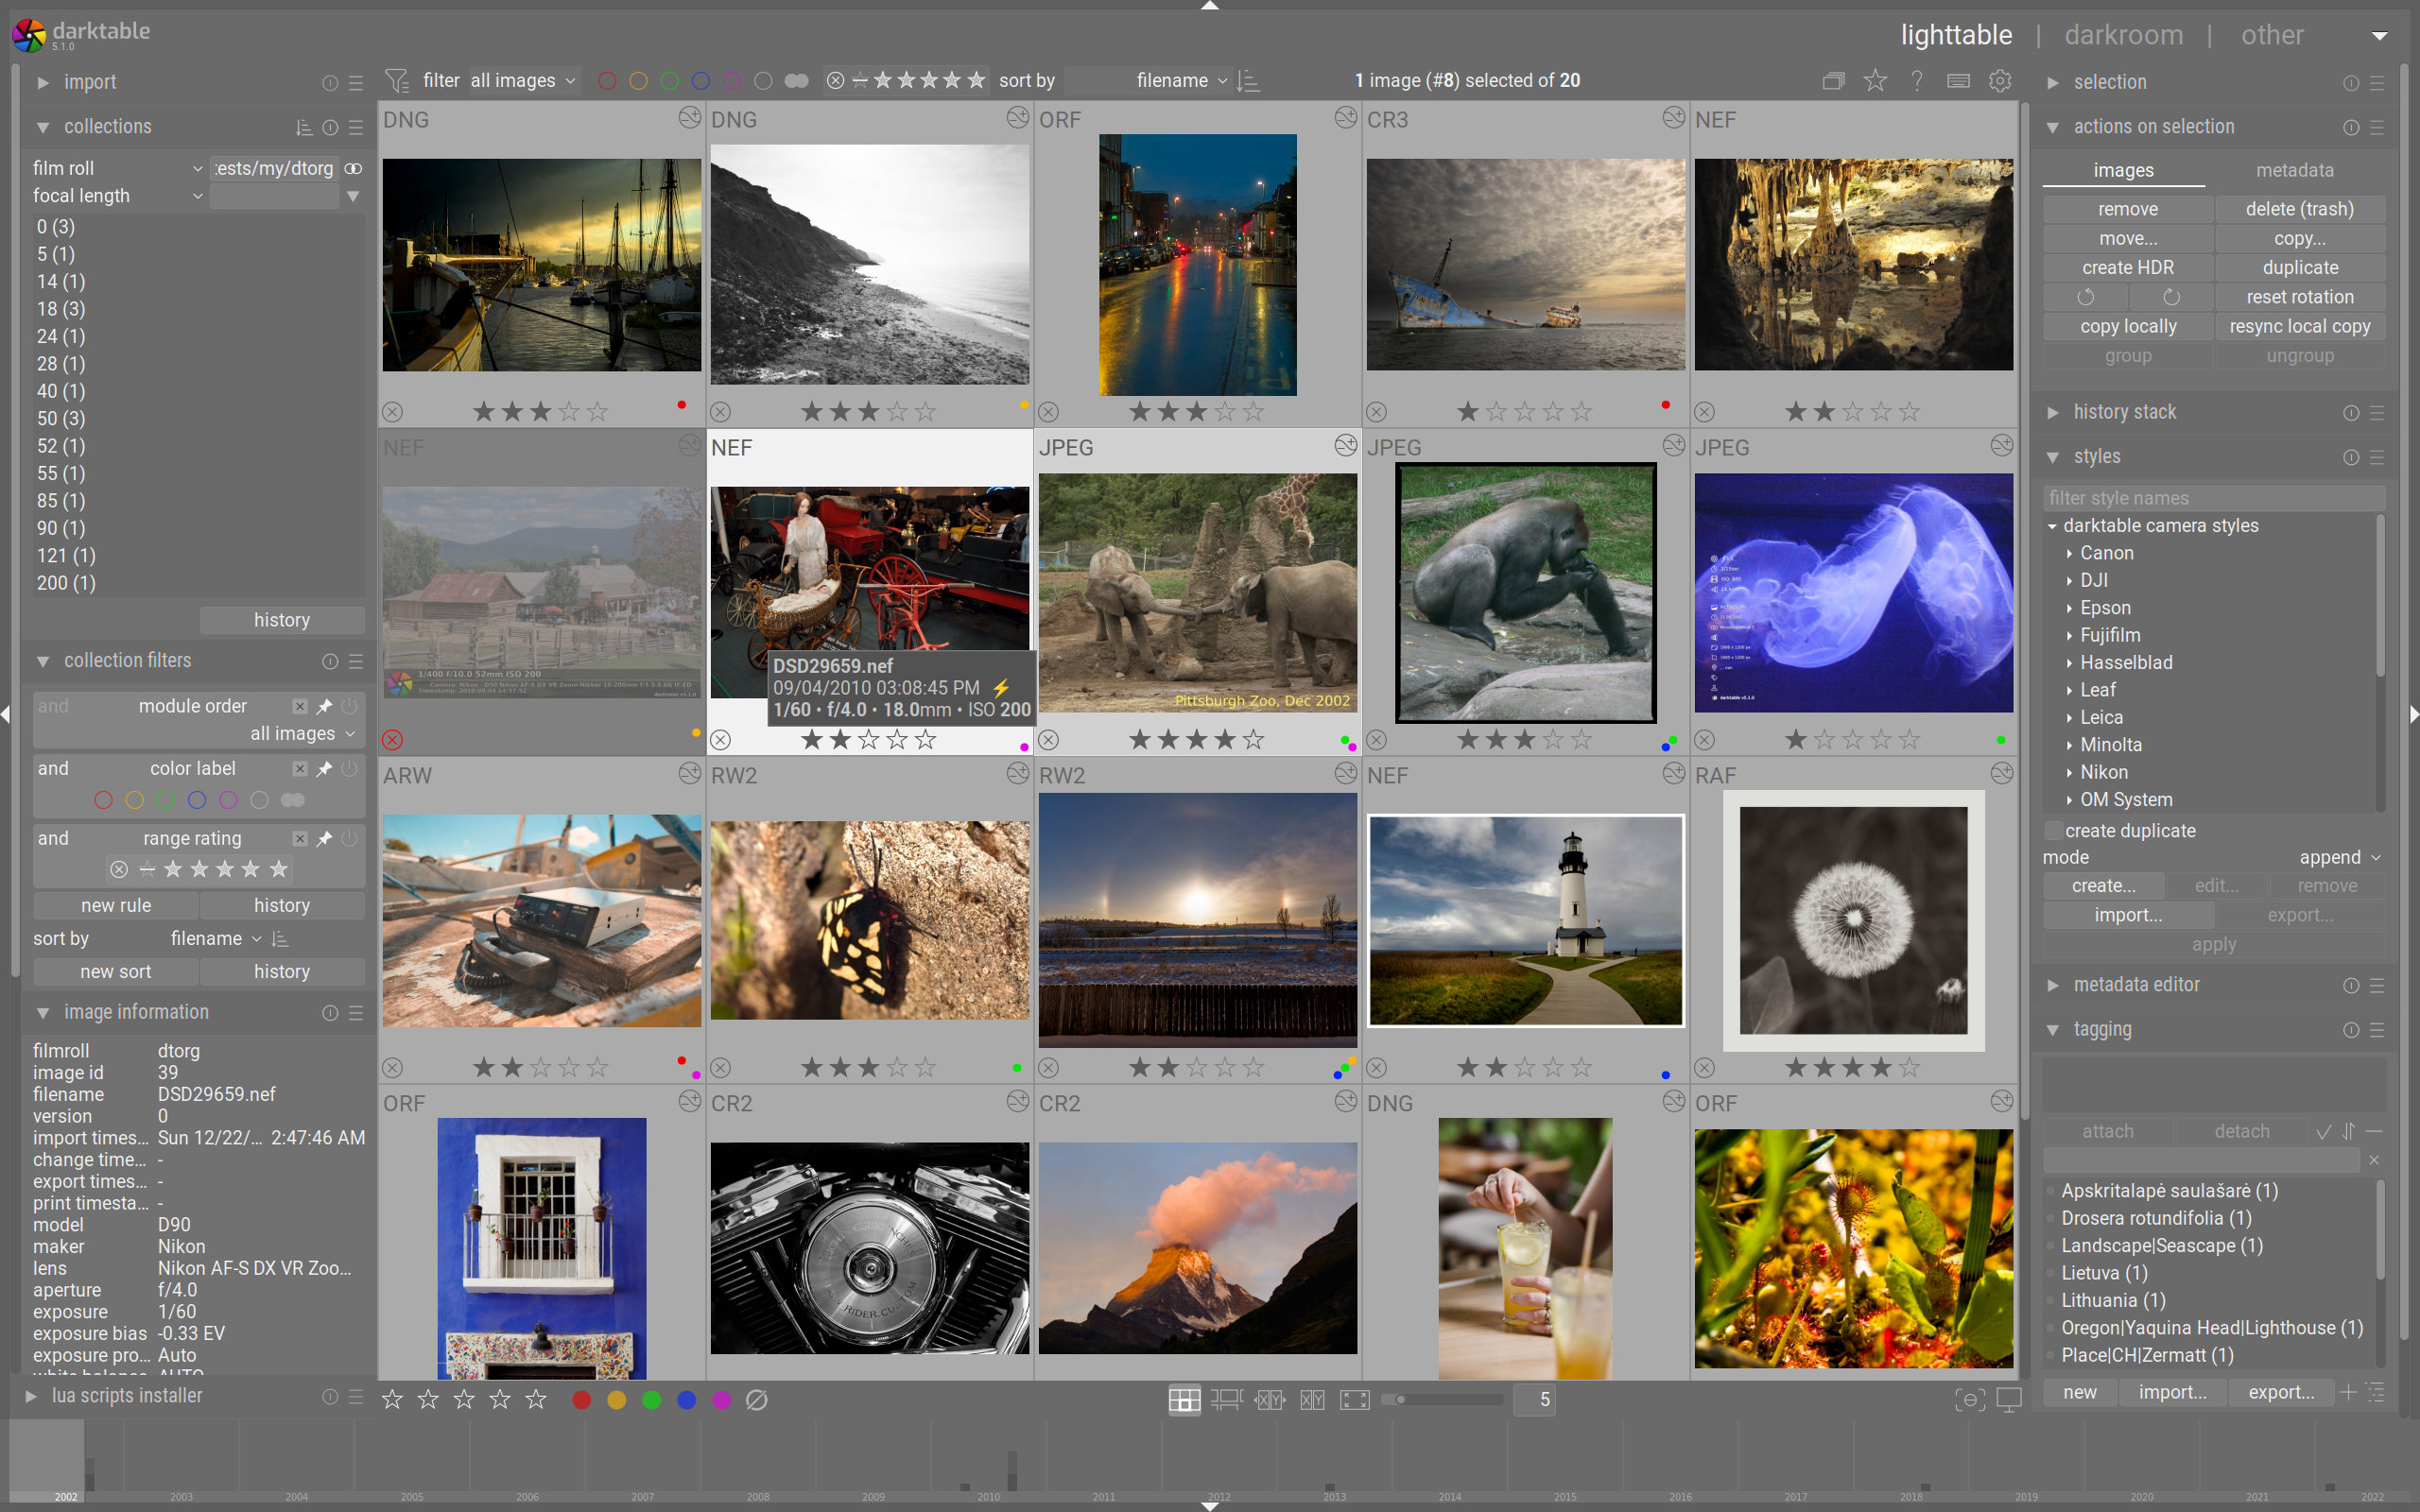
darktable’s lighttable: your photos as a grid of thumbnails, with ratings and filters on the sides. Source: darktable.org.
The original and the edit are separate
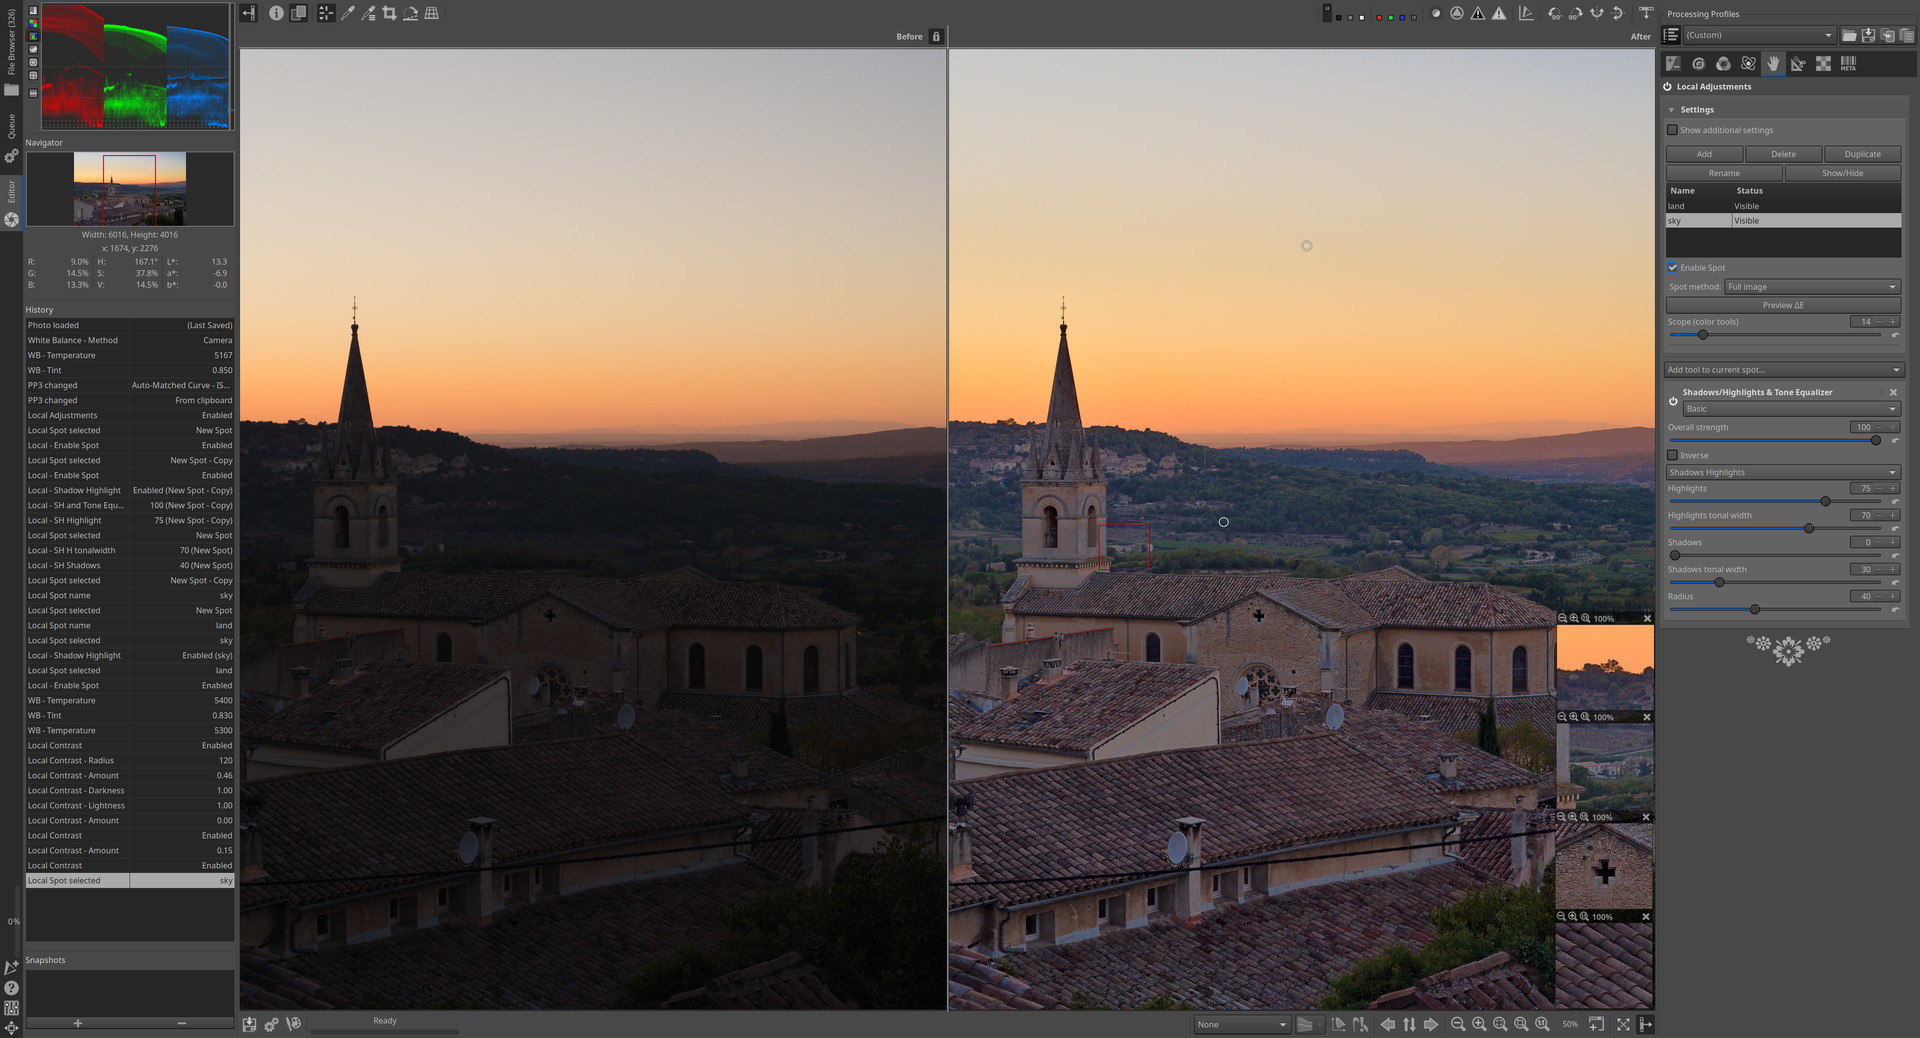
darktable uses a non-destructive workflow. It records processing decisions in its library database, with settings also stored in XMP sidecar files, instead of rewriting the original RAW pixels every time you move a control.
That distinction gives you room to revise an edit. It also means the source file alone is not the complete record of your finished work. Keep the original photos, sidecars and relevant application data in your backup plan.
Non-destructive is not the same as impossible to lose. A missing disk, a deleted source or a lost set of editing settings can still create problems. The software preserving original pixels does not replace a separate backup.
Choose one photograph before choosing every module
The lighttable view helps you organise and select images. Open a chosen photograph in the darkroom to work on its processing. For an initial exercise, use a reasonably exposed picture you know well rather than the darkest, noisiest rescue mission in the folder.
Then make a few deliberate changes and compare them. What needs attention: overall brightness, colour balance, framing or a specific distraction? A goal gives the controls a job. Without one, it is easy to spend twenty minutes making the image different rather than better.
darktable has a deep set of modules. You do not need to activate them all, and moving every slider is not a required initiation ceremony. Start with the documented workflow and add a tool when the photograph presents a reason to use it.
The camera preview is not the final authority
The official processing guide explains why a RAW image may look different from the camera's JPEG preview. The preview has already been processed by the camera, while the RAW development view gives you another starting point and another set of processing choices.
That difference is not automatically a defect. You might prefer the camera's rendition, or you might want a different interpretation. Judge the resulting photograph rather than expecting every RAW editor to reproduce the camera preview exactly.
Be cautious about comparing colour on an uncontrolled display. Screen brightness, room lighting and display profiling all affect what you see. You can begin without a professional studio, but dramatic edits made on an extremely bright screen in a dark room deserve a second look elsewhere.
Export is where the finished picture appears
Because the edits are instructions, you need to export a rendered file to share the developed result outside darktable. The official export guide describes saving a developed RAW image as a JPEG as a common use.
Select the image, choose a destination and appropriate output settings, then export. Keep that destination distinct enough that you can tell the original source from the finished copy. A sensible filename is more useful than another folder of “final-final” variations.
Open the exported file outside darktable. Check the dimensions, appearance and intended use. If you need further substantial editing, the documentation points to TIFF as a useful alternative to JPEG. The correct choice depends on the next step, not a universal rule that one format always wins.
For photographers who want to learn the process
darktable is appealing when you want control over RAW development and a workflow that can grow with a photo collection. It is less appealing if the only acceptable experience is an automatic filter with no decisions to make.
I would begin with a handful of photographs, learn the path from selection to development to export, and only then bring in a large collection. Finishing one image thoughtfully teaches more than importing years of pictures and immediately wondering which module everyone else uses.
See the feature overview and official export guide for the current workflow.