OBS Studio: Record a Clear Screen Demo
- Screen recording
- Video
- Open source
Explaining a computer task over messages can turn into a very slow treasure hunt. “The button on the left.” “Which left?” “Under the other thing.” A short screen recording can be kinder to everyone involved, provided it contains the right window and an audible voice.
OBS Studio is free, open-source software for recording and live streaming. You do not need to become a streamer to use it. A single scene showing one application is enough for a useful tutorial, a bug demonstration or a clear explanation you would otherwise repeat five times.
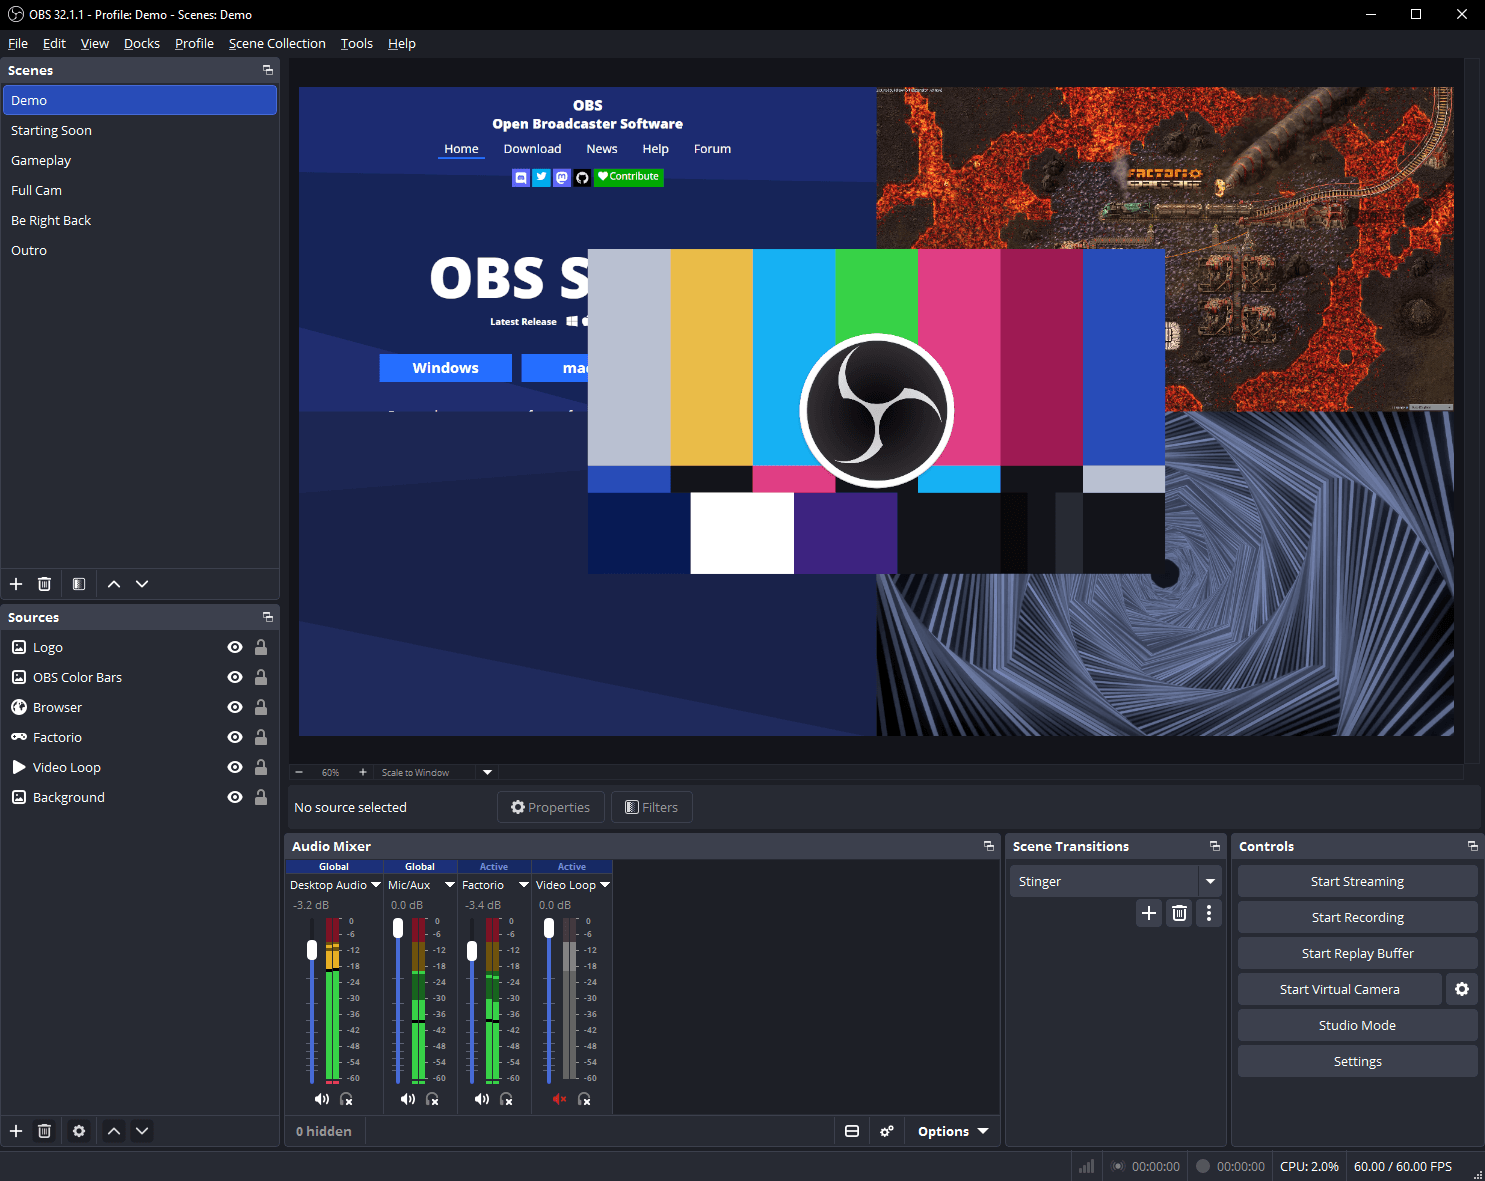
OBS Studio: scenes and sources on the left, audio mixer below, preview front and centre. Source: obsproject.com.
Begin with a recording, not a broadcast
OBS can look imposing because it exposes a lot of controls at once. The first task is to give it a modest job. Choose local recording rather than connecting a streaming account, and keep the initial setup focused on one thing you want to show.
The Auto-Configuration Wizard is the official starting point. It considers your intended use and hardware to suggest settings. You can run it again from the Tools menu if you skipped it or want to change the purpose of the setup.
Those suggestions are a starting point, not a guarantee for every computer and recording. A high-resolution display, a demanding application and a busy machine can produce very different workloads. A short test will tell you more than copying an ambitious settings list from someone else's hardware.
A scene is a composition of sources
Think of a scene as the finished picture and sources as the things placed inside it. A captured window, a webcam, an image and some text can all be sources. For a simple demonstration, start with the application window and add other elements only if they help.
Source availability varies by operating system. The official guide distinguishes display and window capture, Windows game capture and macOS screen-capture options. Choose the source appropriate to your system rather than expecting every menu to match a screenshot from another platform.
Check the preview carefully. Sources higher in the list sit above those below them, so a large image can hide the window you intended to record. Resize and position deliberately, and make sure important interface elements remain within the output.
The audio meter is only half the test
Look at the audio mixer while you speak and while the application plays sound. If the meters do not move, or the wrong device is selected, review the audio settings. Do not assume the laptop microphone is the one OBS chose.
A moving meter proves that a signal exists, not that it sounds good. Record a short sample, stop and play the saved file. Listen for an absent microphone, an unwanted second source, distortion or an echo. This is much easier to fix before a twenty-minute explanation.
Use headphones when that helps keep speaker output from returning through the microphone. Also check whether application sound belongs in the demonstration at all. A silent settings tutorial and a video-playback demonstration have different audio needs.
Keep private material outside the frame
A whole-display capture can include notifications, desktop filenames and unrelated windows. A specific-window capture can reduce that exposure, but you should still inspect exactly what is visible. Source selection is a useful boundary, not a substitute for checking.
Close private tabs, pause notifications and use sample material where possible. If you are demonstrating a form, do not type real credentials or personal records just to make the example look realistic.
Then rehearse the few actions you need to show. A concise recording is usually easier to follow than a long tour with several wrong turns. You do not need a polished production; you need enough preparation to avoid narrating a search for the correct menu.
Finish by opening the file
Before the real session, confirm the output location and recording settings. After recording, open the saved file and inspect the picture, sound and ending. A stopped recording is not yet a verified recording.
OBS Studio suits people who want more control than a one-click recorder, especially when a demonstration needs several visual or audio sources. Start with one scene and one short test. The rest of the toolbox can wait until a real problem calls for it.
Use the official quick-start guide and sources guide for the current setup.