ShareX: Explain a Screenshot Before You Send It
- Windows
- Screenshots
- Productivity
A screenshot with “look here” can be surprisingly difficult to understand. Where is here? Is it the tiny error in the corner, the selected row, or the browser tab you forgot was visible? Sending the whole desktop and hoping the recipient develops detective skills is rarely the best option.
ShareX gives Windows users a free, open-source toolbox for capturing, annotating and sharing what is on screen. Its attraction is the workflow around the screenshot, not merely another shortcut for taking one.
The ShareX main window: capture modes on the left, workflows and recent captures in the middle. Source: getsharex.com.
Capture less, explain more
ShareX supports full-screen, active-window and region captures, along with scrolling captures and screen recordings. For everyday explanations, a selected region is often the most useful place to start. It lets you show the problem without bringing the rest of your desktop along.
Leave enough context for the recipient to understand the image. Cropping an error message so tightly that the application name disappears can create a new mystery. At the other extreme, a whole high-resolution desktop may make the important line unreadable on a phone.
For a support question, think in terms of a small story: which application, what action, and what happened? One well-framed image with a clear annotation can answer those questions faster than a stack of nearly identical screenshots.
Put the arrow where the question is
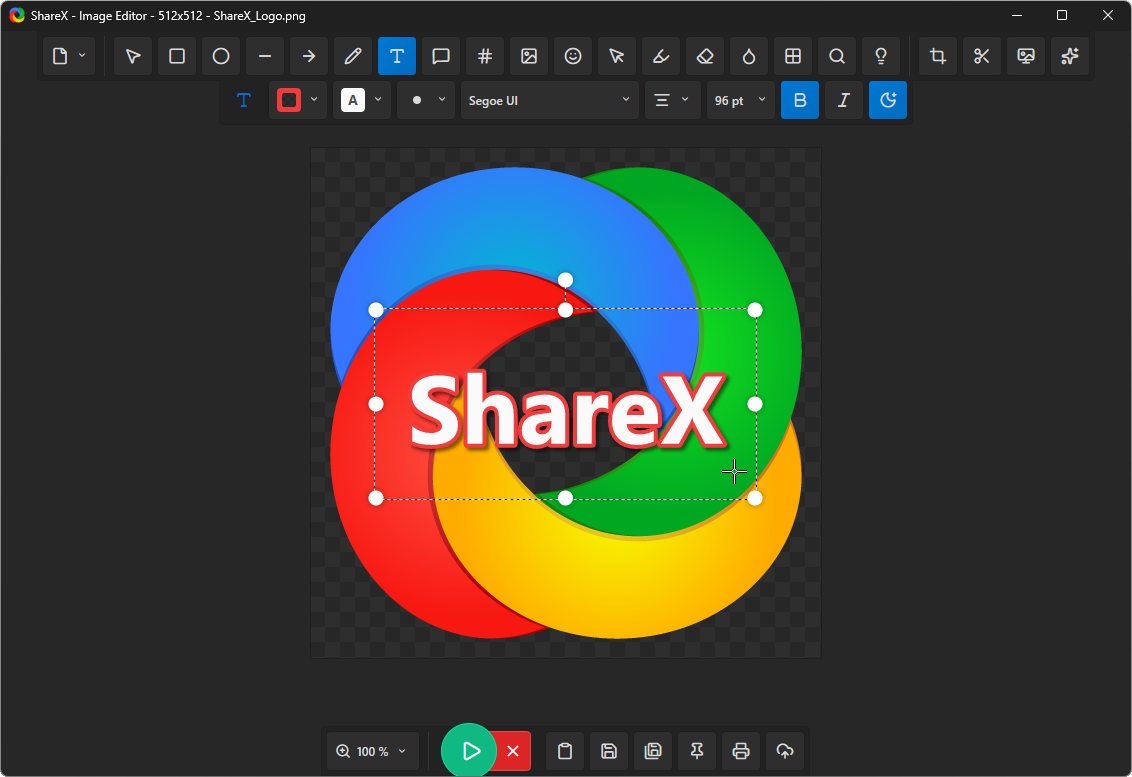
The region-capture tools and image editor include arrows, text, shapes, highlighting and other annotations. Use them to point to the exact setting, field or message being discussed. A short label is usually more helpful than a large circle enclosing half the window.
If there is a sequence to explain, numbered steps can make the image easier to follow. Keep the wording short enough that it remains readable when the picture is scaled down. The screenshot is supposed to reduce the explanation, not become a poster full of instructions.
Check the final image rather than assuming every mark landed correctly. An arrow pointing one row too high is a remarkably efficient way to send someone to the wrong setting. Clear beats decorative every time.
Know what happens after capture
ShareX can chain actions after a capture, including saving, copying, editing and uploading. That is useful when you repeat the same process often. It also means you should understand your selected tasks before capturing anything sensitive.
Start with a conservative local workflow: capture a region, review it and save or copy the result. Add automatic sharing only after deciding which destination should receive your images. A screenshot utility does not need an upload service to be useful.
The official privacy policy says the application does not collect data and sends user-selected or captured files only to third-party services the user chooses and configures. Those services have their own policies. “The app is free and open source” does not mean an uploaded image remains private wherever it is sent.
Redact before the image leaves
Look for names, email addresses, customer records, access tokens, private tabs and notifications. The thing you meant to show may be harmless while the corner of the image is doing all the oversharing.
ShareX offers blur, pixelation and redaction-related editing tools. For genuinely sensitive text, use an opaque cover or remove the area rather than trusting a weak visual blur. Then inspect the exported image at full size. Keep unredacted originals out of the outgoing message too.
Screen recording needs the same care over time. Close irrelevant windows, silence notifications and check the captured area before recording. A five-second demonstration should not accidentally include the next five seconds of your inbox.
A toolbox you can grow into
ShareX has far more options than a casual screenshot needs, including GIF recording, file sharing and a collection of image tools. That depth is useful for frequent support work, documentation and demonstrations, but it can feel busy at first.
I would learn one region shortcut, one annotation workflow and one safe saving route before exploring the rest. There is no prize for configuring every destination on day one. The practical win is sending an image the other person can understand without a follow-up call.
Start with the official feature overview and read the privacy policy before choosing an upload destination.